2 Getting Started
This chapter explains how to install and test Oracle Database and PHP environment. It has the following topics:
What You Need
To install your Oracle Database and PHP environment, you need:
-
Oracle Database Server which includes the sample data for this tutorial
-
Oracle Database Client libraries are included with the Oracle Database software or can be installed using Oracle Instant Client
-
Apache HTTP Server which is typically already installed on Linux computers
-
PHP - PHP Hypertext Preprocessor
-
A text editor for editing PHP code. A code editor such as Oracle JDeveloper with the optional PHP Extension can also be used.
Installing Oracle Database
You should install Oracle Database Server on your computer. The sample data used in this tutorial is installed by default. It is the HR component of the Sample Schemas.
Throughout this tutorial Oracle SQL Developer is the graphical user interface used to perform Database tasks. Oracle SQL Developer is a free graphical tool for database development.
See Also:
-
Oracle Database Sample Schemas guide for information about the
HRsample schema. -
Oracle SQL Developer web page
http://www.oracle.com/technology/products/database/sql_developer/
Unlocking the HR User
The PHP application connects to the database as the HR user. You may need to unlock the HR account as a user with DBA privileges. To unlock the HR user:
-
Open SQL Developer and open a connection to your Oracle database.
-
Login to your Oracle database as system.
-
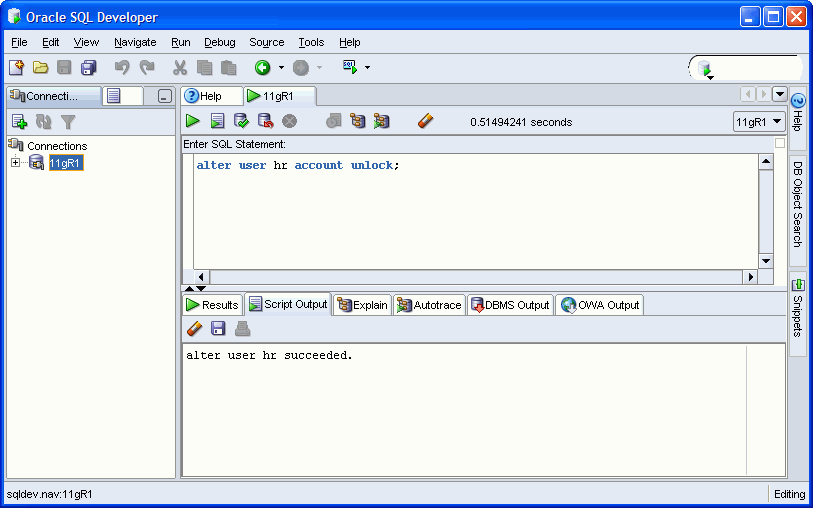
Open SQL Worksheet or SQL*Plus and run the following SQL statement:
alter user hr account unlock;

Description of the illustration chap2_unlock.gif
For further information about unlocking an Oracle Database account, see Chapter 6, "Managing Users and Security," in the Oracle Database 2 Day DBA guide.
See Also:
-
Oracle Database documentation
Installing Apache HTTP Server
You should install Apache before you install PHP. Apache is typically installed by default on Linux computers. See Testing the Apache Installation on Linux before downloading the Apache software.
Perform the following steps to obtain Apache HTTP Server for Windows or Linux:
-
Enter the following URL in your Web browser:
http://httpd.apache.org/download.cgi
-
For Windows, click the apache_2.2.12-win32-x86-no_ssl.msi. For Linux, click httpd-2.2.12.tar.bz2.
-
Save the downloaded file in a temporary directory, such as
c:\tmpon Windows or\tmpon Linux.
Installing Apache on Windows
This section describes how to install Apache HTTP Server on Windows.
The file name and extraction directory are based on the current version. Throughout this procedure, ensure you use the directory name for the version you are installing.
You must be the administrator user to install Apache.
To install Apache, double-click the file and follow the wizards.
The default installation directory is likely to be C:\Program Files\Apache Group. This is the directory that is assumed for the tutorial exercises. If you install to a different directory, you need to note the directory so you can change the path used in the tutorials.
Starting and Stopping Apache on Windows
You can use the Start menu option to start Apache. This opens a console window showing any error messages. Error messages may also be written to C:\Program Files\Apache Group\Apache2\logs\error.log.
You can also use the ApacheMonitor utility to start Apache. It will appear as an icon in your System Tray, or navigate to the Apache bin directory and double click ApacheMonitor.exe. In a default installation, Apache bin is located at c:\Program Files\Apache Group\Apache2\bin.
You can also use the Windows Services to start Apache. You access Windows Services from the Windows Start menu at Start > Control Panel > Administrative Tools > Services. Select the Standard tab. Right click the Apache2 HTTP Server and then select Restart
If you have errors, double check your httpd.conf and php.ini files.
Testing the Apache Installation on Windows
To test the Apache HTTP Server installation:
-
Start your Web browser on the computer on which you installed Apache.
-
Enter the following URL:
http://localhost/
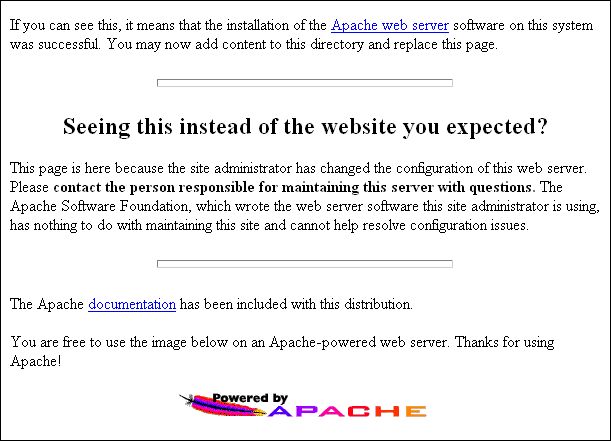
Your Web browser will display a page similar to the following:

Description of the illustration chap2_test_install_013.gif
If this page does not appear check your Apache configuration. Common problems are that Apache is not running, or that it is listening on a non-default port.
Installing Apache on Linux
This section describes how to install Apache HTTP Server on Linux.
The file name and extraction directory are based on the current version. Throughout this procedure, ensure you use the directory name for the version you are installing.
Apache is typically already installed on Linux. If you find it is not installed after Testing the Apache Installation on Linux, perform the following steps to install the Apache HTTP Server:
-
Go to the directory where you downloaded the
httpd-2.2.12.tar.bz2file. -
Log in as the root user and execute these commands:
# tar -jxvf httpd-2.2.12.tar.bz2
# cd httpd-2.2.12
# export ORACLE_HOME=/usr/lib/oracle/app/oracle/product/10.2.0/server
# ./configure \
        --prefix=/usr/local/apache \
        --enable-module=so  \
# make
# make install
The option
--enable-module=soallows PHP to be compiled as a Dynamic Shared Object (DSO). The--prefix=option sets the Apache installation directory used by the commandmake install
Starting and Stopping Apache on Linux
You use the apachectl script to start and stop Apache.
Start Apache with the apachectl script:
# /usr/local/apache/bin/apachectl start
Stop Apache with the apachectl script:
# /usr/local/apache/bin/apachectl stop
When you start Apache, you must have ORACLE_HOME defined. Any other required Oracle environment variables must be set before Apache starts too. These are the same variables set by the $ORACLE_HOME/bin/oracle_env.sh or the /usr/local/bin/oraenv scripts.
For convenience, you could create a script to start Apache as follows:
#!/bin/sh
ORACLE_HOME=/usr/lib/oracle/app/oracle/product/10.2.0/server
export ORACLE_HOME
echo "Oracle Home: $ORACLE_HOME"
echo Starting Apache
/usr/local/apache/bin/apachectl start
Testing the Apache Installation on Linux
To test the Apache HTTP Server installation:
-
Start your Web browser on the host on which you installed Apache, and enter the following URL:
http://localhost/
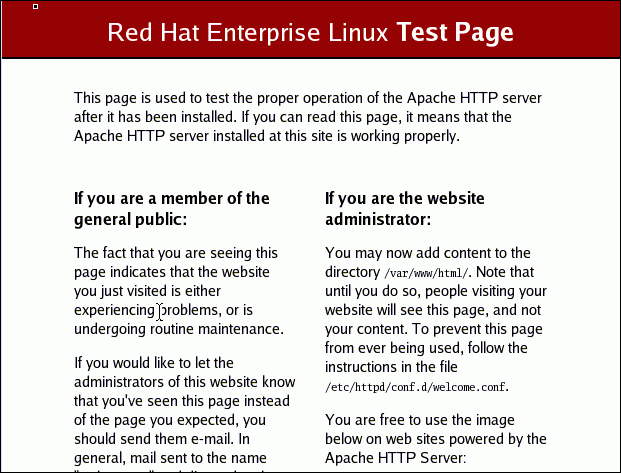
Your Web browser will display a page similar to the following:

Description of the illustration chap2_install_001.gif
If this page does not appear, check your Apache configuration. Common problems are that Apache is not running, or that it is listening on a non default port.
-
In the default Apache HTTP Server configuration file, set up a public virtual directory as
public_htmlfor accessing your PHP files. Use your preferred editor to open the Apache configuration file/etc/httpd/conf/httpd.conf(the directory may be different in your installation of Linux), and remove the pound sign (#) at the start of the following line:UserDir public_htmlIn this example, your Apache
httpd.conffile contains the following lines:<IfModule mod_userdir.c> # # UserDir is disabled by default since it can confirm the presence # of a username on the system (depending on home directory # permissions). # #UserDir disable # # To enable requests to /~user/ to serve the user's public_html # directory, remove the "UserDir disable" line above, and uncomment # the following line instead: # UserDir public_html </IfModule>This enables the Web browser to make an HTTP request using a registered user on the system and to serve files from the
$HOME/public_htmldirectory of the user. For example:http://localhost/~user/
-
To use the new Apache configuration file, in a command window, restart Apache by entering the following commands:
su -
Password: <enter your su (root) password>
apachectl restart

Description of the illustration chap2_install_002.gif
If the Apache HTTP Server does not start, check the error log files to determine the cause. It may be a configuration error.
-
In the command window, log in (not root) and create a
public_htmlsubdirectory in the$HOMEdirectory with the following command:mkdir $HOME/public_html

Description of the illustration chap2_install_003.gif
Installing PHP
Perform the following steps to obtain PHP for Windows or Linux:
-
Enter the following URL in your Web browser:
http://www.php.net/downloads.php
-
For Windows, click the 5.2.10 zip package under Windows Binaries. For Linux, click php-5.2.10.tar.bz2 under Complete Source Code.
-
Save the downloaded file in a temporary directory, such as
c:\tmpon Windows or\tmpon Linux.
Installing PHP on Windows
This section describes how to install PHP on Windows.
The file name and extraction directory are based on the current version. Throughout this procedure, ensure you use the directory name for the version you are installing.
You must be the administrator user to install PHP. To install PHP, perform the following steps:
-
In Windows Explorer, go to the directory where you downloaded the PHP 5.2.10 zip file.
-
Unzip the PHP package to a directory called
C:\php-5.2.10 -
Copy
php.ini-recommendedtoC:\Program Files\Apache Group\Apache2\conf\php.ini -
Edit php.ini to make the following changes:
-
Change
extension_dirtoC:\php-5.2.10\ext, which is the directory containingphp_oci8.dlland the other PHP extensions. -
Remove the semicolon from the beginning of the line
extension=php oci8.dll
-
Set the PHP directive,
display_errors, toOn. For testing it is helpful to see any problems in your code.
-
-
Edit the file
httpd.confand add the following lines. Make sure you use forward slashes '/' and not back slashes '\':# # This will load the PHP module into Apache # LoadModule php5_module c:/php-5.2.10/php5apache2.dll # # This next section will call PHP for .php, .phtml, and .phps files # AddType application/x-httpd-php .php AddType application/x-httpd-php .phtml AddType application/x-httpd-php-source .phps # # This is the directory containing php.ini # PHPIniDir "C:/Program Files/Apache Group/Apache2/conf" -
Restart the Apache Server so that you can test your PHP installation.
You can use the Start menu option to start Apache. This opens a console window showing any error messages. Error messages may also be written to
C:\Program Files\Apache Group\Apache2\logs\error.log.You can also use the ApacheMonitor utility to start Apache. It will appear as an icon in your System Tray, or navigate to the Apache
bindirectory and double clickApacheMonitor.exe. In a default installation, Apachebinis located atc:\Program Files\Apache Group\Apache2\bin.You can also use the Windows Services to start Apache. You access Windows Services from the Windows Start menu at Start > Control Panel > Administrative Tools > Services. Select the Standard tab. Right click the Apache2 HTTP Server and then select Restart
If you have errors, double check your
httpd.confandphp.inifiles.
Installing PHP on Linux
This section describes how to install PHP on Linux.
The file name and extraction directory are based on the current version. Throughout this procedure, ensure you use the directory name for the version you are installing.
Perform the following steps to install PHP:
-
Go to the directory where you downloaded the
php-5.2.10.tar.bz2file. -
Log in as the root user and execute these commands:
# tar -jxvf php-5.2.10.tar.bz2
# cd php-5.2.10
# export ORACLE_HOME=/usr/lib/oracle/app/oracle/product/10.2.0/server
# ./configure \
        --with-oci8=$ORACLE_HOME \
        --with-apxs2=/usr/local/apache/bin/apxs \
        --with-config-file-path=/usr/local/apache/conf \
        --enable-sigchild
# make
# make install
Check the value for ORACLE_HOME to ensure it reflects your Oracle version and installation.
If you are behind a firewall, you may need to set the environment variable
http_proxyto your proxy server before runningmake install. This enables PHP's PEAR components to be installed. -
Copy PHP's supplied initialization file:
# cp php.ini-recommended /usr/local/apache/conf/php.ini
For testing it is helpful to edit
php.iniand set the PHP directive,display_errors, toOnso you can see any problems in your code. -
Edit Apache's configuration file /usr/local/apache/conf/httpd.conf and add the following lines:
#
# This next section will call PHP for .php, .phtml, and .phps files
#
AddType application/x-httpd-php .php
AddType application/x-httpd-php .phtml
AddType application/x-httpd-php-source .phps

#
# This is the directory containing php.ini
#
PHPIniDir "/usr/local/apache/conf"
If a LoadModule line was not inserted by the PHP install, add it with:
LoadModule php5_module modules/libphp5.so
-
Restart the Apache Server to test your PHP installation with the following:
# /usr/local/apache/bin/apachectl start
If there are errors, they will display on your screen. They may also be written to
/usr/local/apache/logs/error_log. If you have problems, double check yourhttpd.confandphp.inifiles.
Testing the PHP Installation
To test the PHP installation:
-
Create a subdirectory called
chap2. To create a directory for your application files, and to change to the newly created directory, enter the following commands in a command window:On Windows:
mkdir "c:\program files\Apache Group\Apache2\htdocs\chap2"
cd c:\program files\Apache Group\Apache2\htdocs\chap2
On Linux:
mkdir $HOME/public_html/chap2
cd $HOME/public_html/chap2
If you create files in a different location, you must change the steps for file editing and execution to match your working directory name and URL.
-
Create a file called
hello.phpthat contains the following HTML text:<?php echo "Hello, world!"; ?>
-
Open a Web browser and enter the following URL in your browser:
On Windows:
http://localhost/chap2/hello.php
On Linux:
http://localhost/~<username>/chap2/hello.php
The line "Hello, world!" appears in the browser.

Description of the illustration chap2_hello_001.gif