12 Working with the Oracle Studio for IMS, VSAM, and Adabas Gateways Workbench
The workbench is a collection of screens. Each screen contains a menu bar, a toolbar, a shortcut bar, and perspectives. A perspective is a visual container for a set of views and content editors. The views are associated with a perspective and are not shared; however, editors are shared across perspectives.
A perspective is like a page within a book. It exists within a screen along with any number of other perspectives and, like a page within a book, only one perspective is visible at any time.
This section contains the following topics:
Using Workbench Parts
This section contains the following topics:
Main Screen
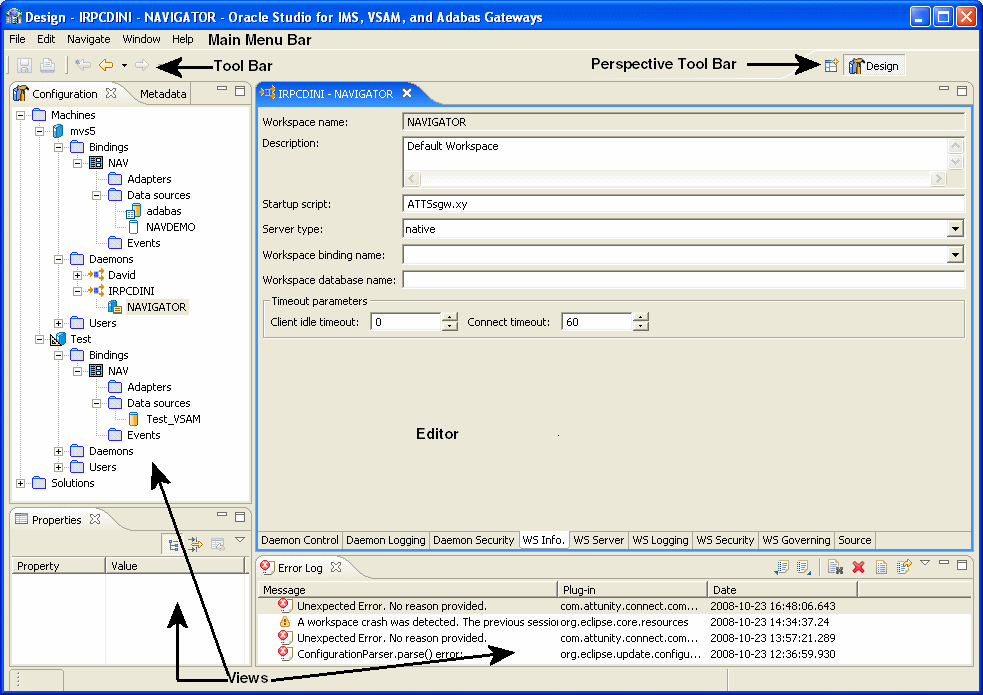
The Main Screen shows the main parts in Oracle Studio for IMS, VSAM, and Adabas Gateways:
Main Menu Bar
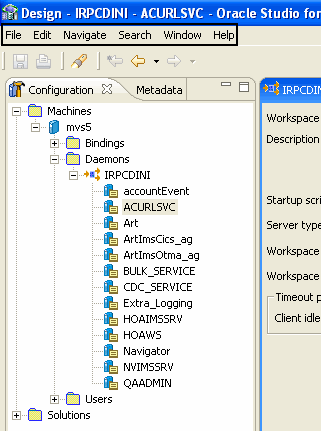
The Workbench main menu bar contains the File, Edit, Navigate, Search, Window, and Help top-level menus.
Working with Views
Views support editors and provide alternative presentations as well as ways to navigate the information in the Workbench.
You can change the layout of a perspective by opening and closing views and by docking them in different positions in the Workbench screen. Views can be opened and closed according to your needs. See Customizing Views below.
The Workbench contains the following Views:
Customizing Views
Views can be customized to let you set up a workbench perspective in a way that is comfortable for you. This section describes how:
To move views into different positions
Click the tab at the top of a view and drag and drop it to the top, bottom, or sides of the workbench where you want to view it.
When you drag and drop a view, you see an outline for it at the position you dragged it to. The outline provides you with a guide to see where you are moving the view.
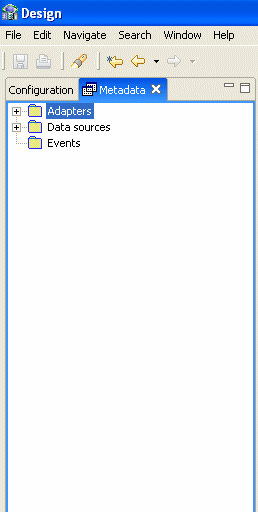
You can move to the same position as another view. If two views are in the same place, click the tab at the top of the view you want to see. For example, by default the Metadata and Configuration views are in the same place, at the left of the workspace (in the Design perspective). To change from the Metadata view to the Configuration view, click the Configuration tab.
When you move it to a new position, you can resize it.
-
Place your cursor on the edge of the view you want to resize. The cursor turns into a double-sided arrow.
-
Drag the view until it has the size you want.
Note:
You cannot resize a view from all sides (top, bottom, left, right) The sides that are active for resizing depend on the view's position in the workbench.
-
From the Window menu, click Show View and then select the view you want to open from the submenu.
-
Select the view from the list, or point to Other and select the view from the Show View window.
Properties View
The Properties view shows the properties of a selected object, with its respective attributes.
Error Log View
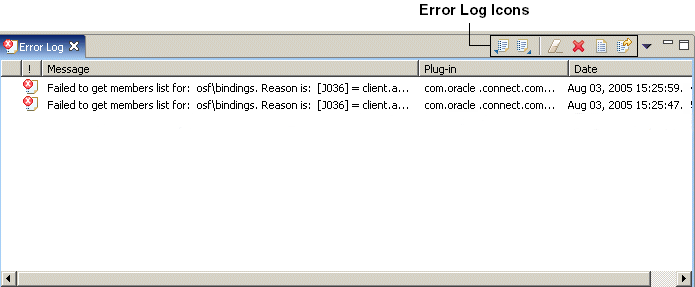
The Error Log View shows errors of which you should be aware. The errors are listed by title.
The Error Log view lets you perform various tasks.
Configuration View
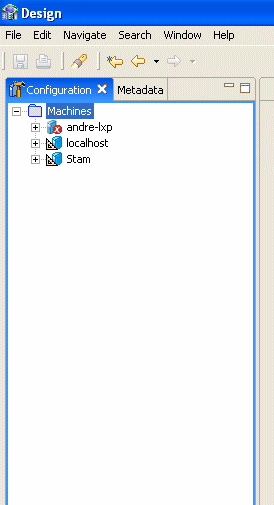
The Configuration view lets you configure all levels of access to data. Together with the Metadata View, it makes up the Design Perspective.
Metadata View
The Metadata View lets you define the metadata for objects. Together with the Configuration View, it makes up the Design Perspective.
Working with Perspectives
A perspective defines the initial set and layout of views in the Workbench screen. In the workbench, each perspective shares the same set of editors and each has its own functions. This lets you carry out a specific type of task or works with individual resources. Perspectives control what appears in certain menus and toolbars.
The following perspectives are available:
Design Perspective
Use the Design perspective to define your environment and create the necessary connections between the relevant data sources that contain the data you want to access.
The Design perspective is made up of the Configuration View and the Metadata View.
Runtime Perspective
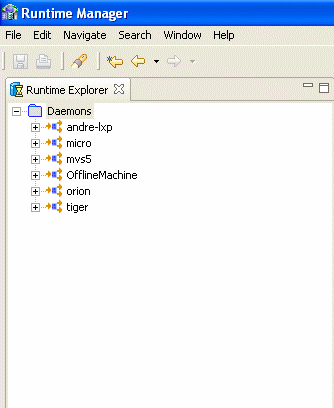
The Runtime perspective lets you monitor the status of daemons and servers. You can view, print and export reports for each daemon and server, and reload and refresh daemons, servers, and configurations.
Selecting a Perspective
You can move between the perspectives in Oracle Studio for IMS, VSAM, and Adabas Gateways using the perspective tool bar on the upper right part of the screen or from the Window menu.
Do one of the following:
-
From the Window menu, click Open Perspective and select the perspective you want to open.
-
Click the Perspective button on the perspective toolbar and select the perspective you want.
Setting Oracle Studio for IMS, VSAM, and Adabas Gateways Preferences
You set preferences for Oracle Studio for IMS, VSAM, and Adabas Gateways from the Window menu. When you open the Preferences screen, a list of categories appears on the left side. You can expand the entries in the tree to find additional subentries where you can set the preferences. The preferences that are important for Oracle Connect for IMS, VSAM, and Adabas Gateways are:
Studio
Note:
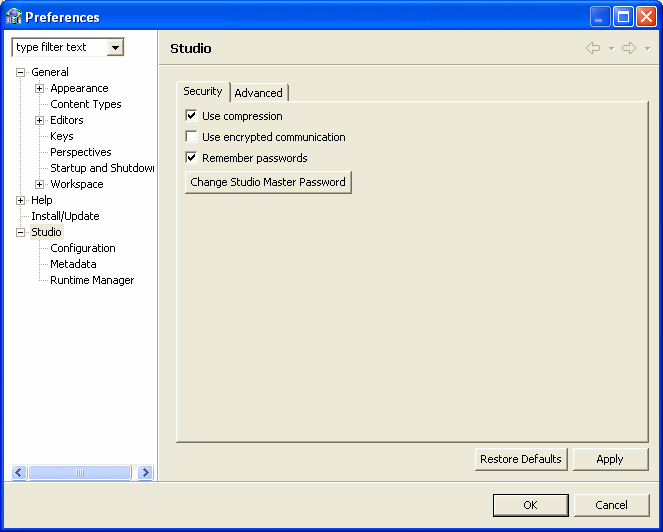
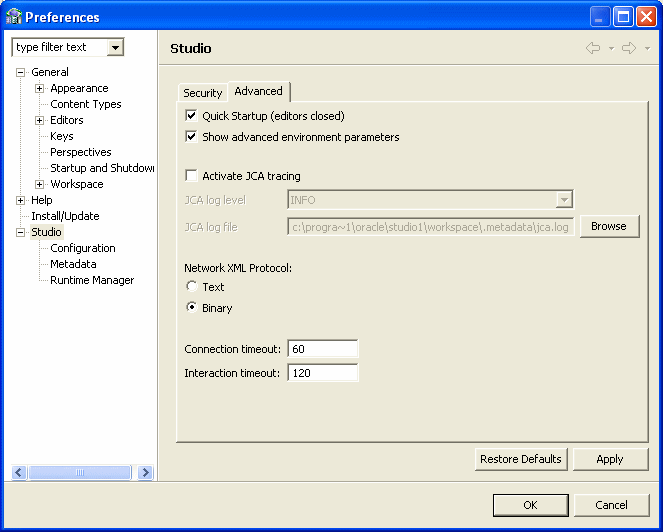
Do not edit any Solution preferences available.The following tables describe the Studio preferences. The Studio preferences section has two tabs.
Table 12-1 Studio Security Tab
| Option | Description |
|---|---|
|
Use Compression |
Select this option to compress data used in Oracle Studio for IMS, VSAM, and Adabas Gateways. |
|
Use encrypted communication |
Select this option to encrypt communication between Oracle Studio for IMS, VSAM, and Adabas Gateways and servers. |
|
Remember Password |
Select this option if you want Oracle Studio for IMS, VSAM, and Adabas Gateways to automatically enter the user's password each time you sign on. |
|
Change Master Password |
Click this option to open the Change Master Password screen and change or create a password for using any module in Oracle Connect for IMS, VSAM, and Adabas Gateways. |
Table 12-2 Studio Advanced Tab
| Option | Description |
|---|---|
|
Quick Startup (editors closed) |
Select this option to start Oracle Studio for IMS, VSAM, and Adabas Gateways with all editors closed and the Design perspective Configuration views collapsed. In this case, none of the editors left open at the end of the previous session will open when you start a new session. This is the default setting. If you clear this check box, all windows open at the end of the previous session will open when you start a new session and Oracle Studio for IMS, VSAM, and Adabas Gateways will take longer to load. |
|
Show advanced environment parameters |
Select this option to display advanced binding environment properties. These properties should only be displayed in coordination with Oracle Support. |
|
Activate JCA tracing |
Select this option to implement tracing and logging on the network and communication transport layer. When you select this check box, the following fields are available:
|
|
Network XML Protocol |
Select Text or Binary. |
|
Connection timeout |
Enter the amount of time (in seconds) that Oracle Studio for IMS, VSAM, and Adabas Gateways waits for a connection to another system (such as a server) before returning an error message. The default value is 60. In this case, Oracle Studio for IMS, VSAM, and Adabas Gateways waits one minute before returning an error message. |
|
Interaction timeout |
Enter the amount of time (in seconds) that Oracle Studio for IMS, VSAM, and Adabas Gateways waits for a connection to a specific interaction (such as a data source) before returning an error message. The default value is 120. In this case, Oracle Studio for IMS, VSAM, and Adabas Gateways waits two minutes before returning an error message. |
Configuration
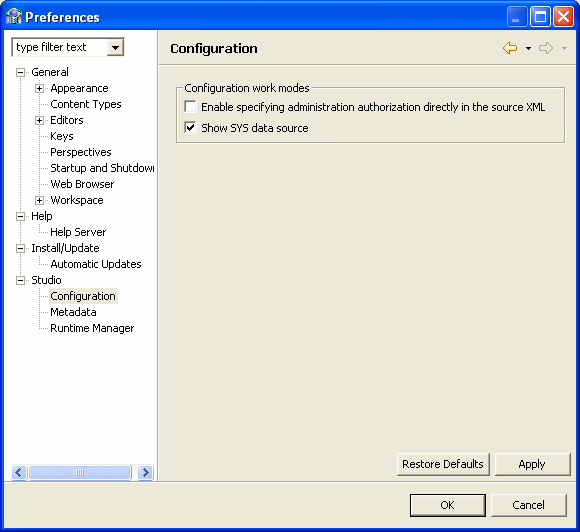
The following table describes the Configuration preferences
Table 12-3 Configuration Preferences
| Option | Description |
|---|---|
|
Enable specifying administration authorization directly in the source XML |
Select this option if you want to enter administration authorization information on the system level. It is added to the system's source XML. |
|
Show SYS data source |
Select this option to display the SYS data source, including stored procedures and views defined for it in the Design perspective Metadata tab. This option is selected by default. |
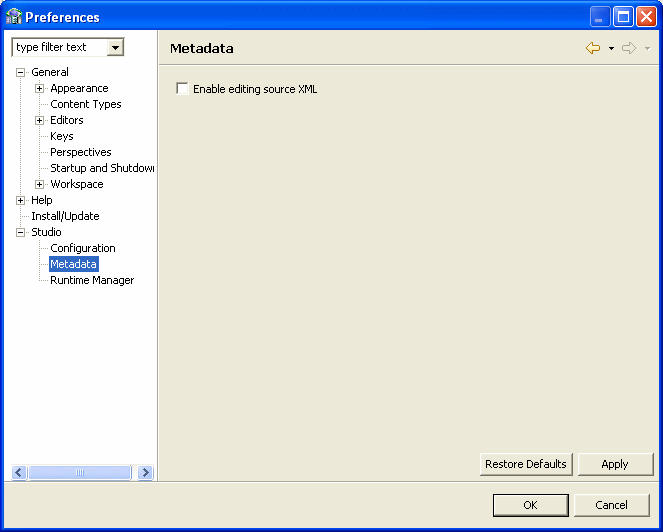
Metadata
The following table describes the Metadata preferences.
Runtime Manager
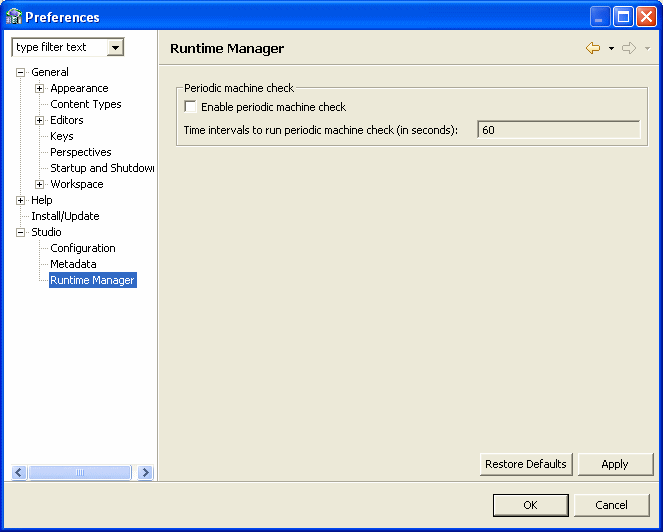
The following table describes the Runtime Manager preferences.
Table 12-5 Runtime Manager Preferences
| Option | Description |
|---|---|
|
Enable periodic machine check |
Select this option to set up a machine check on a scheduled basis. If you select this option, enter a time interval in the field below. The time interval is in seconds. For example, if you want a machine check every minute, enter 60. |
Keys
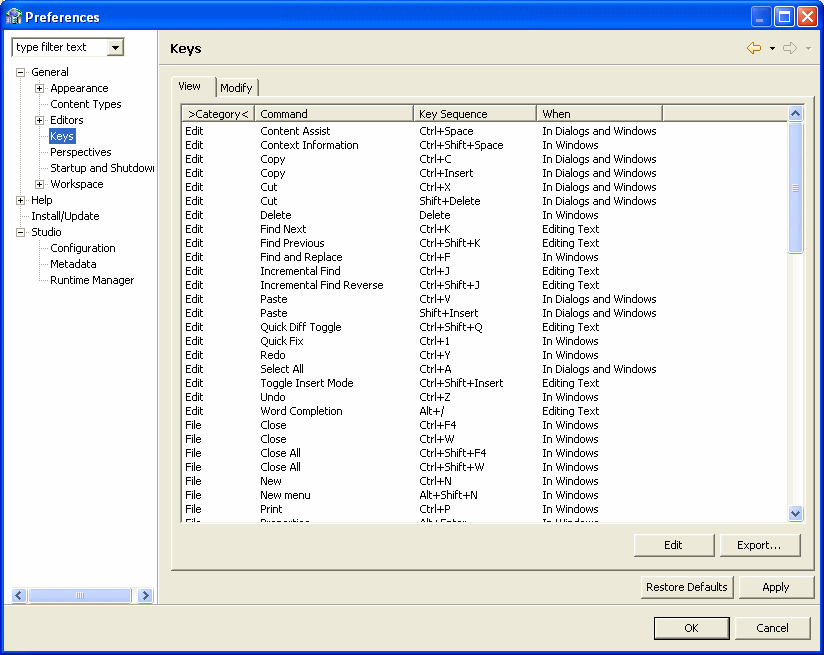
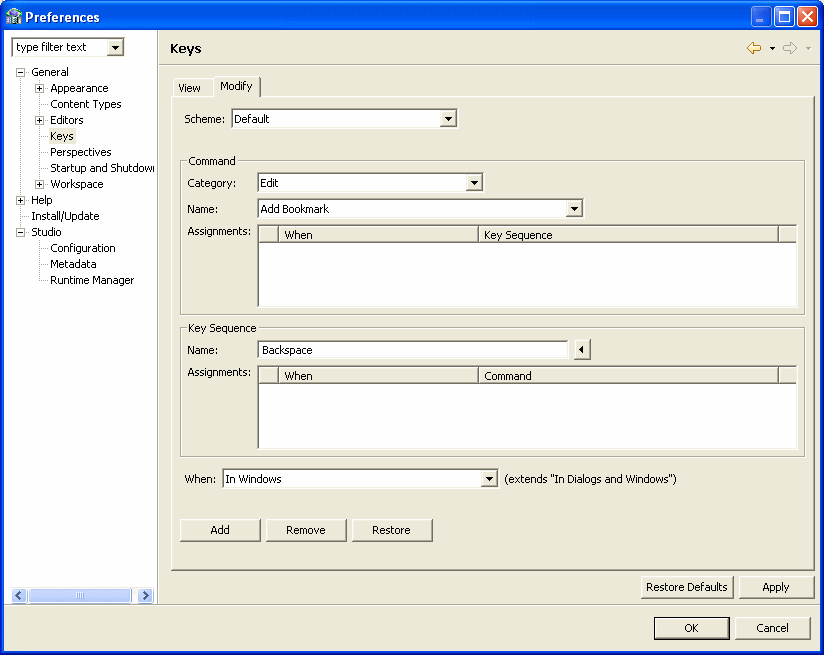
Oracle Studio for IMS, VSAM, and Adabas Gateways has many built-in keyboard shortcuts. You can also customize keyboard shortcuts in Oracle Studio for IMS, VSAM, and Adabas Gateways. The key preferences has two tabs. The View tab shows the list of default shortcuts.
The Modify tab lets you make changes to the current keyboard shortcuts or add new shortcuts. If you want to return to the default settings, click Restore Defaults at the bottom of the screen.
Default Keyboard Shortcuts
This following table shows the default shortcuts available in Oracle Studio for IMS, VSAM, and Adabas Gateways.
Table 12-6 Default Keyboard Shortcuts
| Command | Key Sequence | Context in which the command is available |
|---|---|---|
|
Content Assist |
Ctrl+Space |
In Dialogs and Windows |
|
Context Information |
Ctrl+Shift+Space |
In Windows |
|
Copy |
Ctrl+C |
In Dialogs and Windows |
|
Copy |
Ctrl+Insert |
In Dialogs and Windows |
|
Cut |
Ctrl+X |
In Dialogs and Windows |
|
Cut |
Shift+Delete |
In Dialogs and Windows |
|
Delete |
Delete |
In Windows |
|
Find Next |
Ctrl+K |
Editing Text |
|
Find Previous |
Ctrl+Shift+K |
Editing Text |
|
Find and Replace |
Ctrl+F |
In Windows |
|
Incremental Find |
Ctrl+J |
Editing Text |
|
Incremental Find Reverse |
Ctrl+Shift+J |
Editing Text |
|
Paste |
Ctrl+V |
In Dialogs and Windows |
|
Paste |
Shift+Insert |
In Dialogs and Windows |
|
Quick Diff Toggle |
Ctrl+Shift+Q |
Editing Text |
|
Quick Fix |
Ctrl+1 |
In Windows |
|
Redo |
Ctrl+Y |
In Windows |
|
Select All |
Ctrl+A |
In Dialogs and Windows |
|
Toggle Insert Mode |
Ctrl+Shift+Insert |
Editing Text |
|
Undo |
Ctrl+Z |
In Windows |
|
Word Completion |
Alt+/ |
Editing Text |
|
Close |
Ctrl+F4 |
In Windows |
|
Close |
Ctrl+W |
In Windows |
|
Close All |
Ctrl+Shift+F4 |
In Windows |
|
Close |
All,Ctrl+Shift+W |
In Windows |
|
New |
Ctrl+N |
In Windows |
|
New menu |
Alt+Shift+N |
In Windows |
|
|
Ctrl+P |
In Windows |
|
Properties |
Alt+Enter |
In Windows |
|
Refresh |
F5 |
In Windows |
|
Rename |
F2 |
In Windows |
|
Save |
Ctrl+S |
In Windows |
|
Save All |
Ctrl+Shift+S |
In Windows |
|
Backward History |
Alt+Left |
In Windows |
|
Forward History |
Alt+Right |
In Windows |
|
Go to Line, |
Ctrl+L |
Editing Text |
|
Last Edit Location |
Ctrl+Q |
In Windows |
|
Next,Ctrl+. |
In Windows |
|
|
Open Resource |
Ctrl+Shift+R |
In Windows |
|
Previous, |
Ctrl+, |
In Windows |
|
Show In menu |
Alt+Shift+W |
In Windows |
|
Build All |
Ctrl+B |
In Windows |
|
Open Search Dialog |
Ctrl+H |
In Windows |
|
Collapse |
Ctrl+Numpad_Subtract |
Editing Text |
|
Copy Lines |
Ctrl+Alt+Down |
Editing Text |
|
Delete Line |
,Ctrl+D |
Editing Text |
|
Delete Next Word |
Ctrl+Delete |
Editing Text |
|
Delete Previous Word |
Ctrl+Backspace |
Editing Text |
|
Delete to End of Line |
Ctrl+Shift+Delete |
Editing Text |
|
Duplicate Lines |
Ctrl+Alt+Up |
Editing Text |
|
Expand |
Ctrl+Numpad_Add |
Editing Text |
|
Expand |
All,Ctrl+Numpad_Multiply |
Editing Text |
|
Insert Line Above Current Line |
Ctrl+Shift+Enter |
Editing Text |
|
Insert Line Below Current Line |
Shift+Enter |
Editing Text |
|
Move Lines Down |
Alt+Down |
Editing Text |
|
Move Lines Up |
Alt+Up |
Editing Text |
|
Next Word Editing Text |
Ctrl+Right |
Editing Text |
|
Previous Word |
Ctrl+Left |
Editing Text |
|
Scroll Line Down |
Ctrl+Down |
Editing Text |
|
Scroll Line Up |
Ctrl+Up |
Editing Text |
|
Select Next Word |
Ctrl+Shift+Right |
Editing Text |
|
Select Previous Word |
Ctrl+Shift+Left |
Editing Text |
|
To Lower Case |
Ctrl+Shift+Y |
Editing Text |
|
To Upper Case Editing Text |
Ctrl+Shift+X |
Editing Text |
|
Toggle Folding |
Ctrl+Numpad_Divide |
Editing Text |
|
Toggle Overwrite |
Insert |
Editing Text |
|
Cheat Sheets In Windows |
Alt+Shift+Q, H |
In Windows |
|
Console In Windows |
Alt+Shift+Q, C |
In Windows |
|
Search In Windows |
Alt+Shift+Q, S |
In Windows |
|
Show View (View: Outline) In Windows |
Alt+Shift+Q, O |
In Windows |
|
Show View (View:) |
Alt+Shift+Q, X |
In Windows |
|
Activate Editor |
F12 |
In Windows |
|
Maximize Active View or Editor |
Ctrl+M |
In Windows |
|
Next Editor |
Ctrl+F6 |
In Windows |
|
Next Perspective |
Ctrl+F8 |
In Windows |
|
Next View In Windows |
Ctrl+F7 |
In Windows |
|
Open Editor Drop Down |
Ctrl+E |
In Windows |
|
Previous Editor |
,Ctrl+Shift+F6 |
In Windows |
|
Previous Perspective In Windows |
Ctrl+Shift+F8 |
In Windows |
|
Previous View In Windows |
Ctrl+Shift+F7 |
In Windows |
|
Show Key Assist In Dialogs and Windows |
Ctrl+Shift+L |
In Dialogs and Windows |
|
Show Ruler Context Menu |
Ctrl+F10 |
Editing Text |
|
Show System Menu |
Alt+- |
In Windows |
|
Show View Menu |
Ctrl+F10 |
In Windows |
|
Switch to Editor |
Ctrl+Shift+E |
In Windows |
