8 Developing and Deploying .NET Stored Procedures
This chapter contains:
Overview of .NET Stored Procedures
.NET stored procedures are methods or procedures written in a .NET language which contains SQL or PL/SQL statements.
You can write custom stored procedures and functions using any .NET compliant language, such as C# and VB.NET, and use these .NET stored procedures in the database, in the same manner as other PL/SQL or Java stored procedures. .NET stored procedures can be called from PL/SQL packages, procedures, functions, and triggers; from SQL statements, or from anywhere a PL/SQL procedure or function can be called.
Oracle Database Extensions for .NET (a database option that allows you to write .NET stored procedures) must be installed and configured in the database to run the examples in this chapter.
This chapter discusses how to use and deploy .NET stored procedures in your application.
Starting the Common Language Runtime Service
To use .NET stored procedures, you must first start the common language runtime agent, represented by the OraClrAgent service. This service may not start by default. Note that it is located on the Oracle database, not on the client.
Note:
OraClrAgnt can be accessed through the Services Control Panel, as OracleOracleHomeNameClrAgnt, where OracleHomeName represents your Oracle home.To start the common language runtime service:
-
From the Start menu, select All Programs, then select Administrative Tools, and finally, select Services.
-
In the Services window, click the Extended tab.
Scroll down the list of Services, and select
OracleOracleHomeNameClrAgnt. -
The Service Control window shows that the
OracleClrAgentis starting. -
When the Service Control window closes, note that the status of the
OracleClrAgentis changed toStarted.
Creating a Connection as SYSDBA
Next, you must create a database connection as SYSDBA which enables you to deploy your Oracle Project.
Note:
You must have administrative privileges asSYSDBA to perform this task.Note:
To use the Enterprise Manager to set thesys account password, see About Administrative Accounts and Privileges in the Oracle Database 2 Day DBA.To create a database connection in ODT:
-
From the View menu, select Server Explorer.
-
In Server Explorer, right-click Data Connections.
-
Select Add Connection.
-
When the Add Connection window appears, determine if the Data source says Oracle Database (Oracle ODP.NET).
If it does, skip to Step 6.
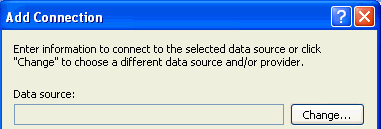
Description of the illustration addconnection1a.gif
If Data source does not say Oracle Database (Oracle ODP.NET), select Change.
The Change Data Source window appears.
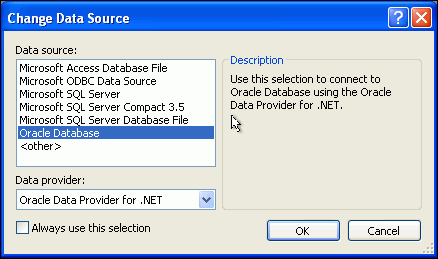
Description of the illustration addconnection2a.gif
-
Choose Oracle Database and then select Oracle Data Provider for .NET.
-
In the Add Connection window, use the following:
-
For User name, enter
sys. -
For Password, enter the password set by the administrator who unlocked and set up the
sysaccount.To use the Enterprise Manager to set the
sysaccount password, see About Administrative Accounts and Privileges in the Oracle Database 2 Day DBA. -
Ensure that the Role is set to
Sysdba.The Connection name is generated automatically from the Data source name and the User name values.
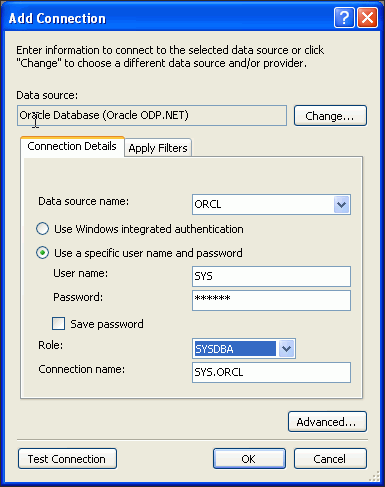
Description of the illustration deploy03.gif
-
-
In the Add Connection window, click OK
The Server Explorer window should now contain the
SYS.ORCLconnection.
Creating an Oracle Project
To use stored procedures in .NET, you must first create a new Oracle Project to hold the stored procedures.
To create a project for .NET stored procedures:
-
From the File menu, select New, and then select Project.
A New Project dialog box appears.
-
In Project Types, select the type of project you are creating:
-
Visual C#:
Visual C# , then select Database, and under Templates:Oracle Project
Enter Name:
HR_DeployStored_CS. -
Visual Basic:
Other Languages, then select Visual Basic and Database, then under Templates: Oracle Project
Enter Name:
HR_DeployStored_VB.
-
-
Enter Location:
C:\HR_Projects. -
Click OK.
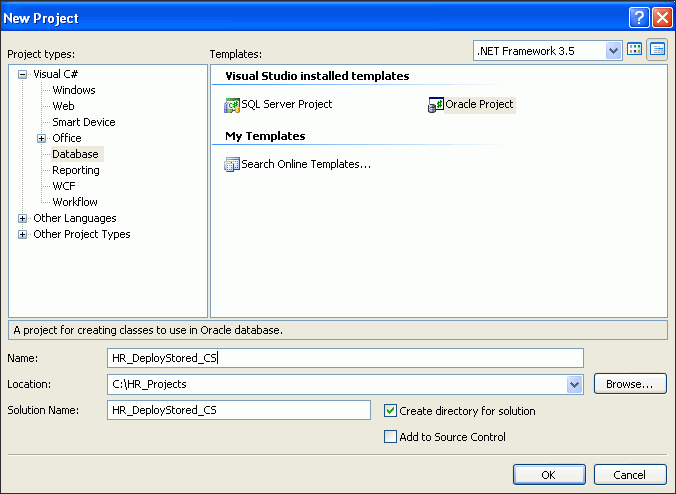
Description of the illustration deploy01.gif
Creating .NET Stored Functions and Procedures
You are now ready to create a .NET stored procedure.
To create a .NET stored procedure:
-
In Solution View, select the Class1.cs or Class1.vb tab in your project.
-
Add these namespace directives for the specific language, as described in "Adding Namespace Directives".
Visual C#:
using Oracle.DataAccess.Client;
using Oracle.DataAccess.Types;
Visual Basic:
Imports Oracle.DataAccess.Client
Imports Oracle.DataAccess.Types
-
Add Reference to
Oracle.DataAccess.dllas described in "Adding a Reference". -
Copy the
getDepartmentno()method into theClass1declaration, as indicatedVisual C#
public static int getDepartmentno(int employee_id)
{
  int department_id = 0;

  // Get a connection to the db
  OracleConnection conn = new OracleConnection();
  conn.ConnectionString = "context connection=true";
  conn.Open();

  // Create and execute a command
  OracleCommand cmd = conn.CreateCommand();
  cmd.CommandText = "select department_id from employees where employee_id = :1";
  cmd.Parameters.Add(":1", OracleDbType.Int32, employee_id,
    ParameterDirection.Input);
  OracleDataReader rdr = cmd.ExecuteReader();

  while(rdr.Read())
    department_id=rdr.GetInt32(0);

  rdr.Close();
  cmd.Dispose();

  // Return the employee's department number
  return department_id;
}
Visual Basic:
Public Shared Function getDepartmentno(ByVal employee_id As Integer) As Integer
  Dim department_id As Integer = 0

  ' Get a connection to the db
  Dim conn As OracleConnection = New OracleConnection()
  conn.ConnectionString = "context connection=true"
  conn.Open()

  ' Create and execute a command
  Dim cmd As OracleCommand = conn.CreateCommand()
  cmd.CommandText = "select department_id from employees where employee_id = :1"
  cmd.Parameters.Add(":1", OracleDbType.Int32, employee_id,     ParameterDirection.Input)
  Dim rdr As OracleDataReader = cmd.ExecuteReader()

  While rdr.Read()
    department_id = rdr.GetInt32(0)

  End While

  rdr.Close()
  cmd.Dispose()

  ' Return the employee's department number
  Return department_id

End Function
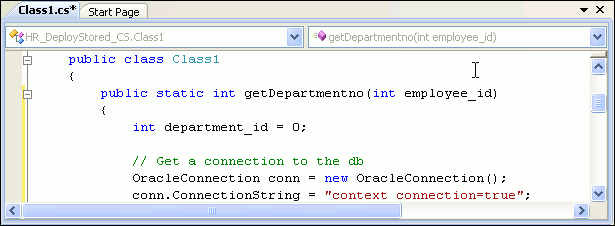
Description of the illustration deploy04.gif
-
Save
Class1. -
From the Build menu, select Build Solution.
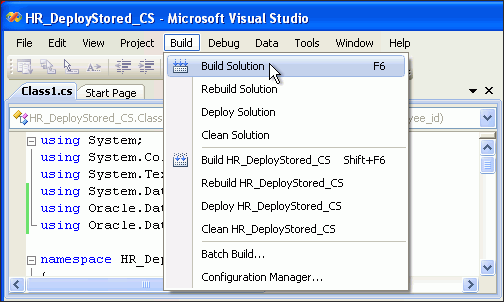
Description of the illustration deploy05.gif
-
Check that the Output window indicates a successful build and close it.
Deploying .NET Stored Functions and Procedures
You can now deploy the .NET stored procedure that you created "Creating .NET Stored Functions and Procedures".
To deploy a .NET stored procedure:
-
From the Build menu, select Deploy Solution.
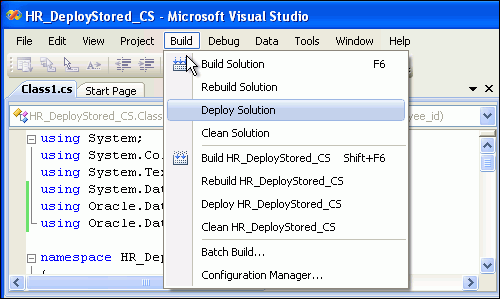
Description of the illustration deploy06.gif
An Oracle Deployment Wizard for .NET window appears.
-
In the Oracle Deployment Wizard for .NET window, click Next.
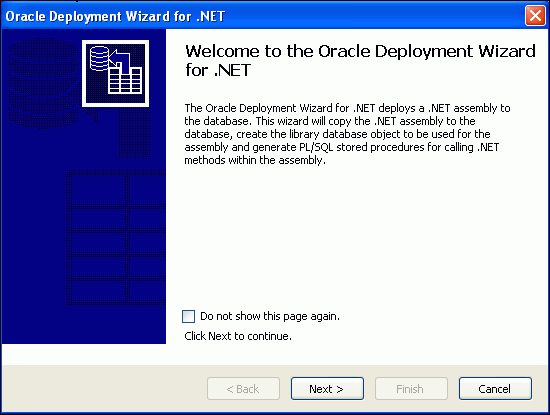
Description of the illustration deploy07.gif
-
On the Configure your OracleConnection window, click Next.
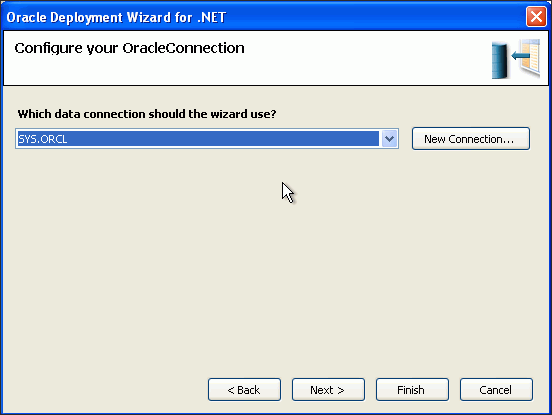
Description of the illustration deploy08.gif
-
On the Specify your deployment option window, ensure that the first option, Copy assembly and generate stored procedures is selected, and click Next.
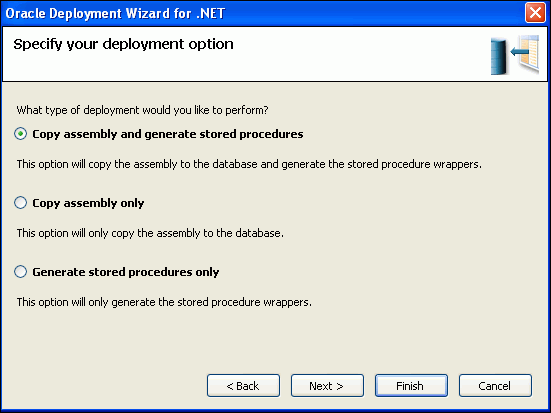
Description of the illustration deploy10.gif
-
On the Specify an assembly and library name window, accept the defaults and click Next.
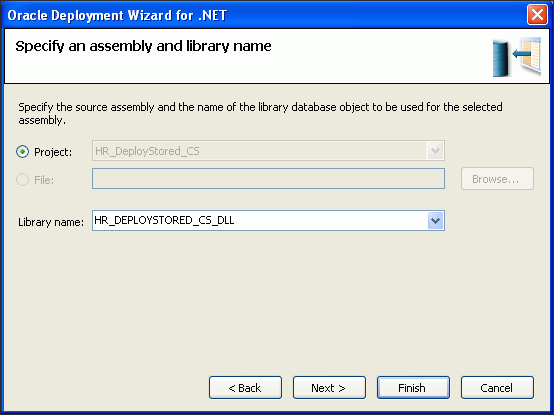
Description of the illustration deploy11.gif
-
On the Specify copy options window, accept the defaults and click Next.
Visual Basic:
If you are using Visual Basic, the
Microsoft.VisualBasicassembly also appears as a referenced assembly.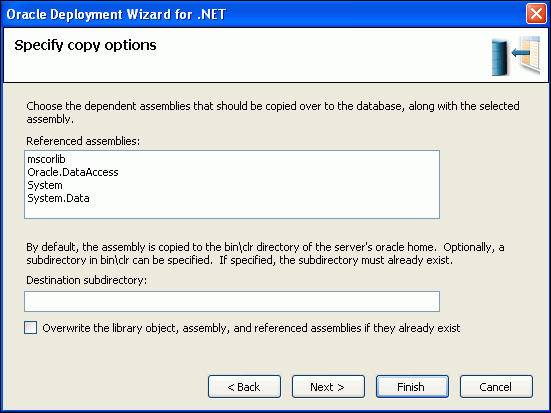
Description of the illustration deploy12.gif
-
On the Specify methods and security details window, under Available methods, expand HR_DeployStored_CS or HR_DeployStored_VB, then expand Class1, and select the
getDepartmentno()method.Under Method Details, select HR from the Schema list.
Click Next.
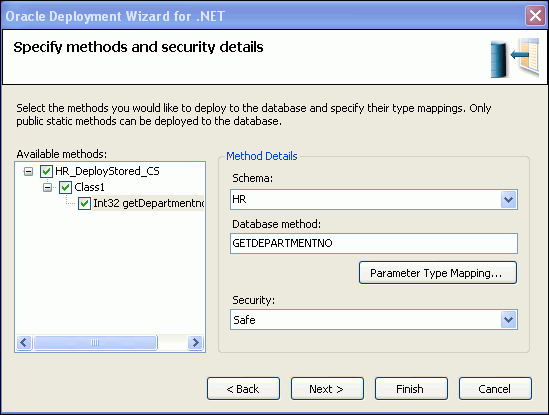
Description of the illustration deploy13.gif
-
On the Summary window, click Finish.
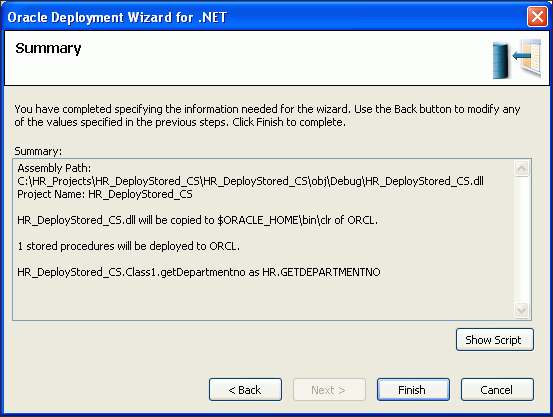
Description of the illustration deploy14.gif
Running .NET Stored Functions and Procedures
You are now ready to run the .NET stored procedure you deployed earlier.
To run a .NET stored procedure:
-
In Server Explorer, open and expand the
HR.ORCLconnection. Expand Functions. Right-clickGETDEPARTMENTNOand select Run.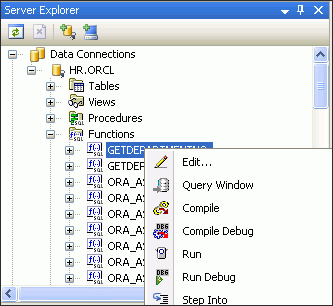
Description of the illustration deploy15.gif
The Run Function window appears.
-
In the Run Function window, enter a
Valueof100forEMPLOYEE_ID.Click OK.
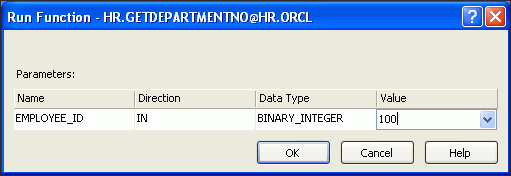
Description of the illustration deploy16.gif
-
Note that the return value for department is
90, indicating thatEMPLOYEE_ID100is in department 90.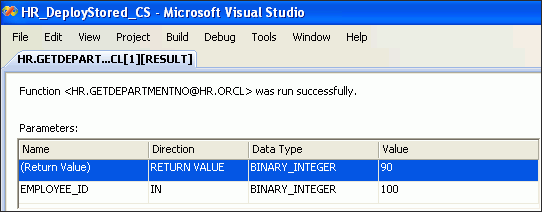
Description of the illustration deploy17.gif
Running .NET Stored Procedure in a Query Window
You can run the .NET stored procedure that you have just created using the ODT Query Window, in addition to running it from Server Explorer.
-
Open the Server Explorer in the
HR.ORCLschema. -
Expand Functions and select
GETDEPARTMENTNO. -
Right-click and select Query Window.
-
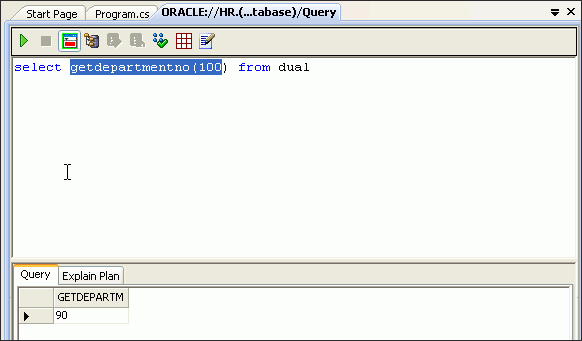
Enter
Selectgetdepartmentno(100)fromdual. -
Click Execute from the toolbar.
Description of the illustration querywindow.gif