2 Installing .NET Products
This chapter contains:
What You Need
This section lists the products and database schemas you need to run the examples provided in this guide.
Oracle Database
You must have Oracle Database installed, either locally or on a remote computer.
Note:
The samples in this guide all require Oracle Database 11g client. However, you may use any Oracle Database 9i Release 2 or higher as they are supported with this client.If you plan to use Oracle Database Extensions for .NET, then the client also requires connecting to Oracle Database 11g.
You can administer the database with the user interface, Enterprise Manager, which can run scripts and queries, and more.
See Also:
Oracle Database Express Edition Installation Guide for Microsoft Windows if you do not have the Oracle Database installed and configuredSample Data
The sample data used in this book is contained in the HR schema, one of the Oracle Sample Schemas. The Sample Schemas are included as part of the Oracle Database installation.
See Also:
Oracle Database Sample Schemas for the HR data model and table descriptionsOracle Data Access Components
Oracle Data Access Components (ODAC) is a collection of tools that include:
-
Oracle Developer Tools for Visual Studio
-
Oracle Data Provider for .NET
-
Oracle Providers for ASP.NET
-
Oracle Provider for OLE DB
-
Oracle Objects for OLE
-
Oracle ODBC Driver
-
Oracle Services for Microsoft Transaction Server
-
Oracle SQL*Plus
-
Oracle Instant Client
Oracle Database Extensions for .NET
Oracle Database Extensions for .NET is installed as part of the Oracle Database 11g installation on Windows. After Oracle Database Extensions for .NET is installed, the ODAC installation provides an upgrade to Oracle Database Extensions for .NET. This upgrade is included as part of the Oracle Data Access Components for Oracle Server option, which is shown in the screen shot in Step #4 of the section "Installing .NET Products". You only need to perform this upgrade and install Oracle Database Extensions for .NET if you plan to complete Chapter 8 in this book.
Visual Studio Versions
If you are using Visual Studio 2008, you must install it before proceeding with instructions in this book.If you are using Microsoft Visual Studio 2005, you may notice differences in screen shots, shortcuts, menu options, and generated code, but generally the differences should be minor and not cause problems.
Installing .NET Products
These steps demonstrate how to install Oracle Developer Tools for Visual Studio (ODT) and Oracle Data Provider for .NET and other ODAC products once Visual Studio is installed.
Note:
Please note that as new versions of Oracle .NET products are released, the install process may change slightly from what is shown in this guide. The screenshots are based on Oracle Data Access Components (ODAC) version 11.1.0.6.21.-
In your Internet browser, navigate to the following location, and download ODAC with Oracle Developer Tools for Visual Studio:
http://www.oracle.com/technology/software/tech/windows/odpnet/index.html
-
Extract all the files from the zip file to a folder in your file system.
-
Oracle Installer launches. A screen appears briefly to detect required dependencies and then the Oracle Universal Installer (OUI) Welcome screen appears.
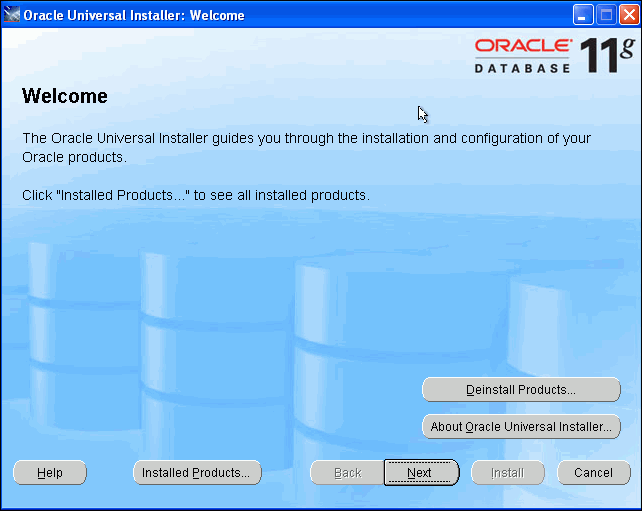
Description of the illustration install01.gif
-
The Select a Product to Install screen appears
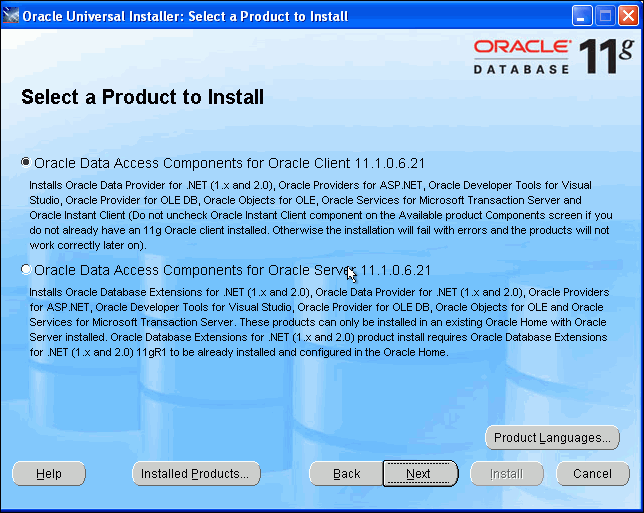
Description of the illustration install02.gif
-
This option, ODAC for Oracle Client, installs only products that are used in a client Oracle home. The second option, ODAC for Oracle Server, allows you to install directly into an Oracle home that contains an Oracle database.
-
Click Next.
The Install Location window appears, allowing you to chose the installation location. By default, a new client Oracle home is created. For the purposes of this guide, accept the default which will create a new Oracle home.
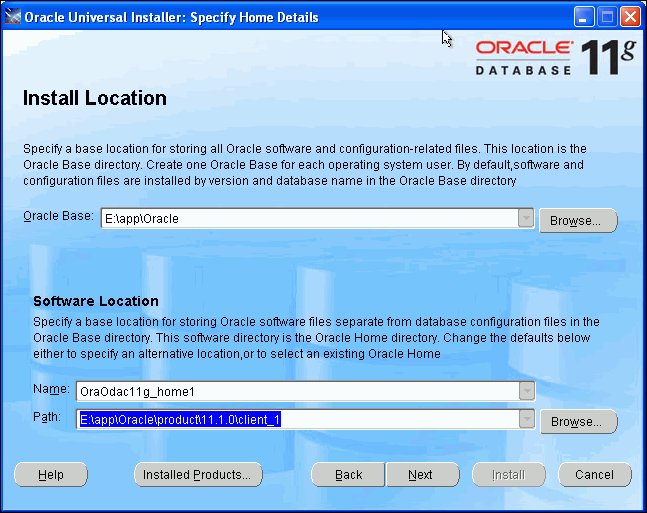
Description of the illustration install03.gif
-
The installer performs prerequisite check. The status for each should be succeeded.
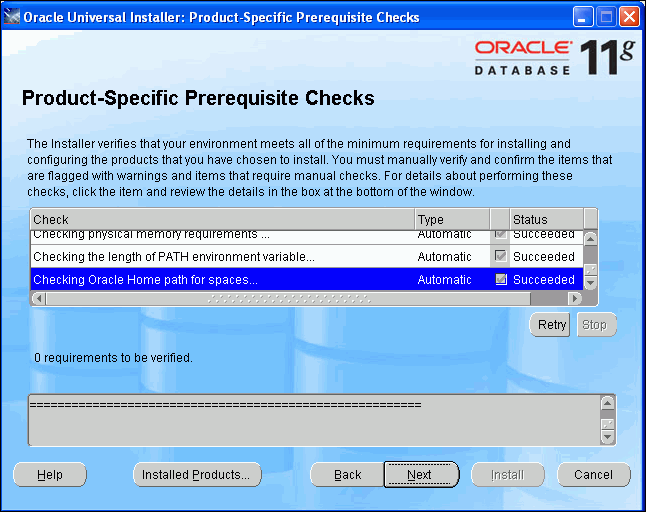
Description of the illustration install04.gif
-
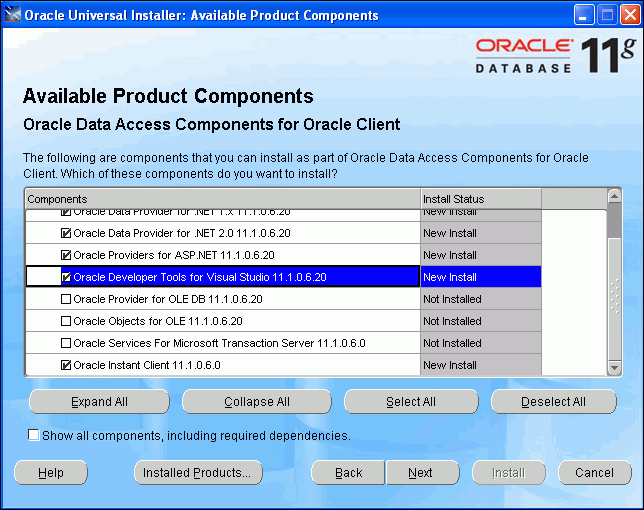
The Available Product Components screen appears.
Please be sure that the following are checked:
-
Oracle Data Provider for .NET 2.0
-
Oracle Providers for ASP.NET
-
Oracle Developer Tools for Visual Studio
-
Oracle Instant Client
Description of the illustration install05.gif
-
-
Click Next.
A screen appears reminding you that you must run the SQL scripts located in
ORACLE_BASE\\ORACLE_HOME\client_1\ASP.NET\SQLif you wish to use Oracle Providers for ASP.NET. -
Click Next.
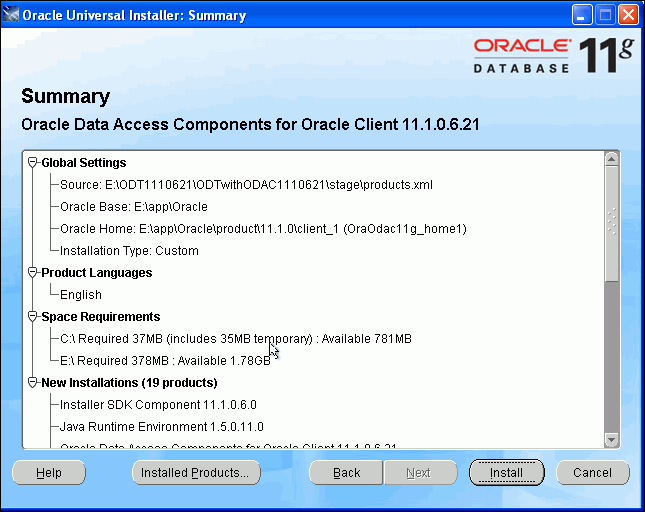
The Summary window appears.
Description of the illustration install06.gif
-
Click Install to complete the installation.
The end of the installation screen appears. It reminds you again to install the ASP.NET scripts. Do this if you plan to use the Oracle Providers for ASP.NET.
-
Click Exit.
Configuring a NET Connect Alias
The tnsnames.ora file defines database server addresses so that the Oracle client can use a short version of the name to connect to databases. Your DBA may have already provided you with a preconfigured tnsnames.ora file.
Otherwise, you need to navigate to the ORACLE_BASE\\ORACLE_HOME\network\admin\sample directory and copy the tnsnames.ora and sqlnet.ora files located there to the ORACLE_BASE\\ORACLE_HOME\network\admin directory.
You may use the following connect descriptor in your tnsnames.ora file and change the values shown in italics for your specific environment:
Example 2-1 tnsnames.ora connect descriptor
address name =
 (DESCRIPTION =
   (ADDRESS_LIST =
     (ADDRESS = (PROTOCOL = TCP)(Host = hostname)(Port = port))
   )
 (CONNECT_DATA =
   (SERVICE_NAME = sid)
 )
)
Where:
sid: Is the database service name
hostname: Is the database computer name
port: Is the port to use to communicate to the database
address name: Is a user-defined short name for the connect descriptor. This short name will be used in the connection string of your .NET application.
Example 2-2 shows a sample tnsnames.ora file.
Setup for Oracle Providers for ASP.NET
Oracle Providers for ASP.NET store web application state inside the Oracle database, under the context of a database user's schema. The administrator can create new database users to store application state.
This database user does not map to a single physical user, but acts as a repository to store ASP.NET information for all web site users. Thus, the application state of a single web user or multiple web users may be stored inside this new database user's schema.
Note:
In this tutorial, the database user is calledASPNET_DB_USER, to indicate that it is a Oracle Providers for ASP.NET database user.At runtime, the ASP.NET application connects to the database using the database user's credentials, in the connection string.
To set up the Oracle database, database administrators must grant certain database privileges to the Oracle Providers for ASP.NET database user schema. With these privileges, the database user can create the tables, views, stored procedures, and other database objects that Oracle Providers for ASP.NET require.
After the privileges have been granted, the database user then can run the Oracle Provider for ASP.NET configuration scripts.
See Also:
Oracle Providers for ASP.NET Developer's Guide for a complete referenceThis section walks you step by step through the Oracle Providers for ASP.NET setup for your database. You do not have to complete this section if you do not plan to complete the ASP.NET provider portion of this tutorial (second half of Chapter 7). The Oracle Providers for ASP.NET setup uses Oracle Developer Tools for Visual Studio, which should be installed before beginning setup.
This section contains these topics:
Oracle Providers for ASP.NET Database User Setup
For this tutorial, you will create the new database user schema, ASPNET_DB_USER, to store the ASP.NET provider data in. You will grant user ASPNET_DB_USER specific database privileges and run the ASP.NET provider database scripts to setup the schema. This schema will contain the tables, stored procedures, and other database objects necessary for Oracle Providers for ASP.NET.
This section contains these topics:
Creating the User and Granting Privileges
To add the new user and grant the required privileges:
-
Login as
SYSor another database administration user. This is described in "Creating a Connection as SYSDBA". -
In the Server Explorer Query Window, create the new
ASPNET_DB_USERuser, as follows:.-
In Server Explorer, right-click
SYS.ORCLand right-click to the Query Window,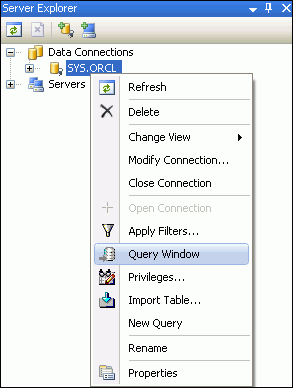
Description of the illustration aspnt_install01.gif
-
In the query window, enter the command:
create user ASPNET_DB_USER identified by your_passwordThis step creates the user
ASPNET_DB_USERin the database, with the password that you enter.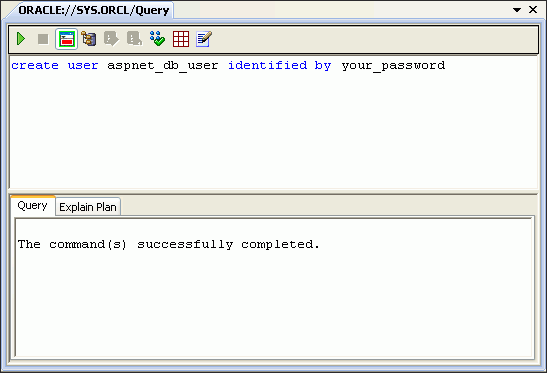
Description of the illustration aspnt_install02.gif
-
Run the command by clicking Execute Query (the green arrow at the top left). The bottom window indicates that the command was successfully completed.
-
-
Return to the Server Explorer, select
SYS.ORCLagain, right-click and select Privileges...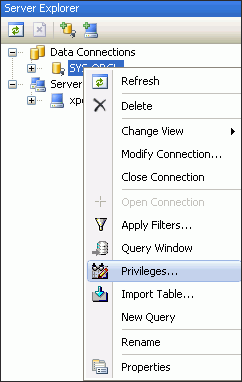
Description of the illustration aspnt_install03.gif
This brings up the Grant/Revoke Privileges Wizard in ODT.
-
Grant privileges to the new database user so it can create the schema and store web site state for the ASP.NET providers:
-
Set Object type to
USERand set User toASPNET_DB_USER.Note:
You may need to refresh in order to seeASPNET_DB_USER. -
Use the right angle ( >) arrow in the middle to move privileges from the Available Privileges list to the Granted Privileges list.
The generally required privileges include:
-
Change notification
-
Create job
-
Create procedure
-
Create public synonym
-
Create role
-
Create session
-
Create table
-
Create view
-
Drop public synonym
-
Unlimited Tablespace - This example grants
ASPNET_DB_USERunlimited tablespace. However, in most cases the administrator assigns the database user a specific tablespace quota.
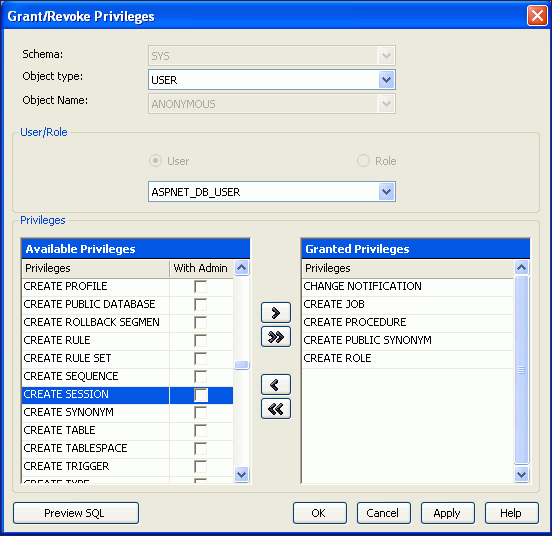
Description of the illustration aspnt_install04.gif
Click Apply and the output window indicates success. Click OK.
Errors may occur during the setup script execution if the Oracle Providers for ASP.NET user is not granted the necessary privileges.
-
-
Configuring All Oracle Providers for ASP.NET
To configure all providers in the database at once, run InstallAllOracleASPNETProviders.sql.
To run this script in Oracle Developer Tools, do the following:
-
In Visual Studio, select Tools, then select Run SQL*Plus Script. When the screen comes up, select Browse.
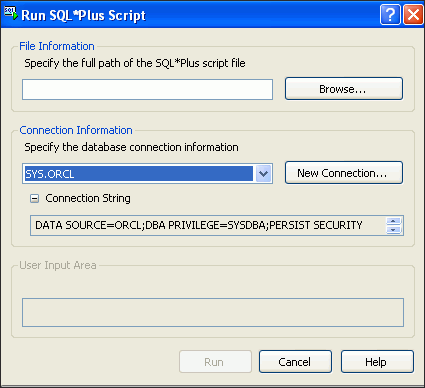
Description of the illustration aspnt_install05a.gif
-
Browse to the
ORACLE_BASE\\ORACLE_HOME\ASP.NET\sqldirectory whereORACLE_BASE\\ORACLE_HOMErepresents your Oracle home, selectInstallAllOracleASPNETProviders.sql, and click Open.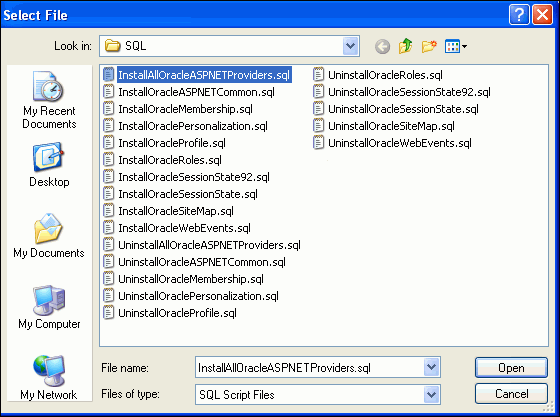
Description of the illustration aspnt_install05.gif
-
When the Run SQL*Plus Script screen reappears, select New Connection.
When the Connection Properties screen appears, be sure that the data source is Oracle Database (Oracle ODP.NET) and the data source name
ORCL. Then enter the User name,ASPNET_DB_USER, and Password, with the Role as Default. Click OK.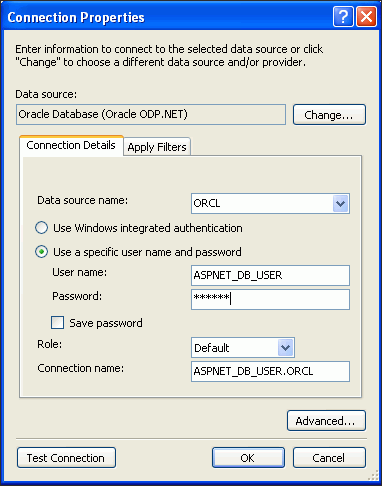
Description of the illustration aspnt_install06.gif
In some situations, the Oracle Server Login dialog may appear. If it does, you can choose whether or not to Save Password.
-
When Run SQL*Plus Script reappears, select Run.
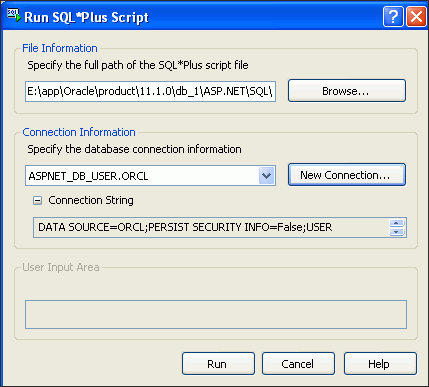
Description of the illustration aspnt_install07.gif
The SQL file runs, and in the background, the output window confirms the success of the scripts.
-
When the scripts finish running, select Cancel.
Configuring Oracle Providers for ASP.NET Individually
Applications may not require all Oracle Providers for ASP.NET. You can set up providers individually. In general, you must execute the InstallOracleASPNETCommon.sql install script before any other install scripts. It sets up a common infrastructure for the ASP.NET providers. Then, for each required Oracle Provider for ASP.NET, execute the specific SQL script (in any order).
These install scripts are located in the ORACLE_BASE\\ORACLE_HOME\ASP.NET\sql directory.
Table 2-1 Individual Install Scripts for Oracle Providers for ASP.NET
| Provider | Required Installation Script |
|---|---|
|
Oracle Membership Provider |
|
|
Oracle Personalization Provider |
|
|
Oracle Profile Provider |
|
|
Oracle Role Provider |
|
|
Oracle Session State Provider |
For Oracle Database 10g Release 1 and later For Oracle Database 9i Release 2 There are correspondingly named uninstall scripts for these install scripts. Note: This provider does not require the execution of |
|
Oracle Site Map Provider |
|
|
Oracle Web Events Provider |
|
|
Oracle Cache Dependency Provider |
No script execution needed |
Uninstalling Schemas for Oracle Providers for ASP.NET
Use the corresponding uninstall scripts to remove database objects created by the install scripts. These scripts have the prefix Uninstall.
Setting the Connection String
With the database now configured to store and retrieve Oracle Providers for ASP.NET information, the middle-tier or client must be able to connect to the ASPNET_DB_USER user.
To configure the connection information on your computer:
-
Go to the
machine.configfile located here:drive:\WINDOWS\Microsoft.NET\Framework\v2.0.50727\CONFIG -
With your text editor, search for
<connectionStrings>and change the line that begins with<add name="OraAspNetConString"..to add the user id, password, data source entry, data source, and provider name as follows:<connectionStrings> <add name="OraAspNetConString" connectionString="User Id=aspnet_db_user;Password=your_password;Data Source=orcl;" providerName="Oracle.DataAccess.Client" /> </connectionStrings>
Note:
Be sure to change the password to the one that you have created. Also, be sure to remove any carriage returns that you might have copied into the connection string.
Customizing Oracle Providers for ASP.NET for Different Setups
Developers can customize the properties of each ASP.NET provider from within the <system.web> section of the machine.config file.
While Oracle Universal Installer automatically configures the machine.config file, developers can apply more fine-grained application-level control over the Oracle Providers for ASP.NET by using the web.config file. This file overrides entries from the machine.config file, but only for the specific web application it is associated with. Developers can set up their web.config file with the same XML syntax as the machine.config file.